
Moving from my spacious 800sqft studio at Tweedsmuir into my 90sqft home workspace has not been without its challenges. For one thing, I absolutely despite clutter, and for the first month after moving in, I was sorting through boxes and boxes of art supplies. Personally, I find it much easier to start clean with zero objects and add what I need, than to sit down and sort through piles of stuff where I save way too many things on the excuse of "just in case." For that first month, the studio wasn't so much a workspace as a clutter magnet, as I learned to compromise with a smaller space and prioritize which supplies got to remain in the room and which would be banished to my crawlspace.
But there was one studio element that I was not willing to compromise on, and that was lighting. When I moved in, the space had a three-bulb circular halogen track, which not only didn't provide enough light for the work that I do, but was probably in the 2700K temperature range.

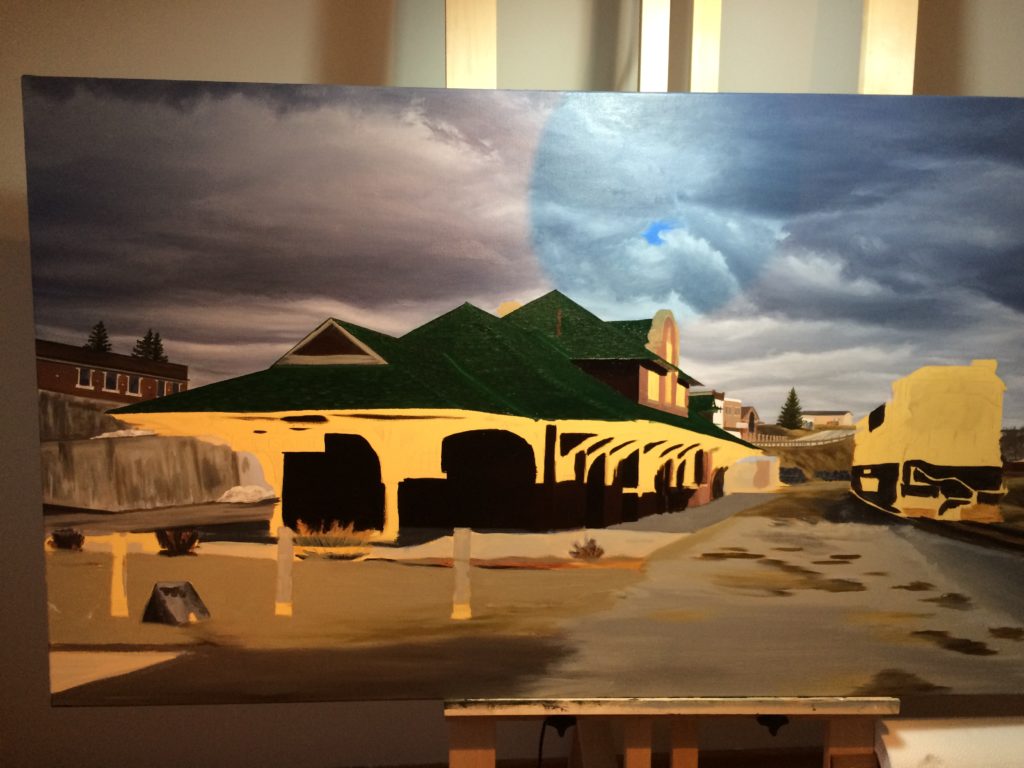
What's the kelvin temperature range, you ask? In terms of lighting a studio space, it is the single most important element to be considered. It's not enough that a space be bright, it has to have the right temperature of lighting, or else it will completely wreck your ability to read colour. Take the picture below: the painting is lit by an easel lamp on the right, which is the correct temperature of 5000K, and the halogen track to the left. The line down the middle is where they meet. See the difference lighting can make?
I knew I had to remedy the situation ASAP, or risk only being able to paint during daylight hours. I headed over to Home Depot, and got a brighter LED track light (~$90, including an $8 energystar rebate), and set about installing it. Except it too was too warm on the Kelvin scale, which I only realized upon installing the darn thing. See the photos below: the nice thing about having white walls is that when there is any colour tinting happening, it's immediately visible. While the lighting was certainly an improvement, it was still far too yellow.

Better, but still too yellow.

Yellow walls = no good lighting.
"It seems fine," said my partner, who was trying to assuage the situation. "Why not leave it for a few days, see how you like it?"
"No, because it's wrong. It has to go."
Artists: it doesn't matter if you're just starting and are a complete and total novice, do NOT compromise on your lighting! You have to be able to see your colours accurately.
So, back I went to Home Depot. I returned the track lighting, and bought a cheap flush mount ($20) that can hold three bulbs. Then, I bought three Philips daylight bulbs ($18) that are at the perfect 5000K. Overall, my solution cost about $40. Compare below:

The new fixture: ugly, yet functional

Lighting the canvas, no yellow on the wall behind it.

Painting over painting comparison, the one on the bottom is lit by my new lighting set up.
Two simple Solutions for your setup
- Get an LED daylight bulb, plug it into an existing lamp or overhead fixture, and you're off to the races. This is perfect for children who need a worklamp for their hobby.
- Purchase a higher end light, like an Ottlite or Daylight (this is what I have on my easel). Both will run you ~$100+.